Disclosure: We may earn commissions if you purchase products after clicking on a link from our site.
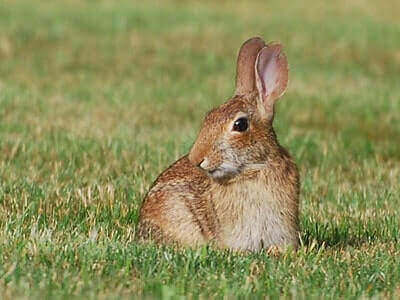
Want to learn how to tan a rabbit hide? Tanning a rabbit hide is easy and fairly quick process. If you hunt rabbits and want to learn how to tan a rabbit’s hide, then this is the article you need to read. We discuss the steps to take a raw rabbit hide and tan in into a soft and pliable fur that can be used for carpet or clothing.
How To Tan A Rabbit Hide
- Fleshing the Hide
Fleshing the hide is a crucial step in the tanning process of a rabbit hide, involving the removal of any remaining flesh, fat, and connective tissue from the skin. After the rabbit hide has been skinned, it typically retains some flesh and fat that must be removed to ensure a clean and well-prepared surface for tanning.
Fleshing can be done using specialized fleshing tools like fleshing knives or beam-mounted fleshing tools. The hide is stretched out, fur-side down, and the fleshing tool is carefully used to scrape away the tissue from the skin. This process requires patience and precision to avoid damaging the hide while effectively removing all traces of flesh.
Fleshing not only ensures that the hide will tan evenly but also prevents the growth of bacteria and mold that could cause the hide to decay during the tanning process. Once fleshing is complete, the hide is ready for further treatment, such as salting, soaking in tanning solutions, or applying tanning agents to achieve the desired softness and durability. Overall, fleshing is an essential step in preparing a rabbit hide for tanning, laying the foundation for a quality finished product.
2. Salting
Salting is a crucial step in the process of tanning a rabbit hide, serving to preserve the skin and prepare it for further treatment. After removing the flesh and fat from the rabbit hide, it must be thoroughly cleaned to remove any remaining tissue and debris.
Once cleaned, the hide is then laid flat, fur-side down, and generously coated with a layer of salt. The salt acts as a desiccant, drawing moisture out of the skin and inhibiting bacterial growth, which could otherwise lead to decay. The salted hide is then left to sit for a period of time, typically around 24 to 48 hours, allowing the salt to penetrate the skin and effectively cure it.
During this time, excess moisture is expelled from the hide, leaving it in a preserved state that is ready for further processing. After salting, the hide can be rinsed to remove excess salt before proceeding with the tanning process, which may involve additional steps such as soaking in a tanning solution or applying a tanning agent to soften the skin and make it supple for various uses, such as crafting or garment making. Overall, salting is a vital initial step in tanning rabbit hides, ensuring they remain preserved and ready for further treatment.
3. Rinse The Pelt
Rinsing the pelt is a critical step in the tanning process of a rabbit hide, serving to remove any remaining debris, salts, or residues from previous treatments. After fleshing and salting the hide, it is essential to thoroughly rinse it to ensure that all contaminants are eliminated before further processing.
Typically, the hide is rinsed in clean water multiple times, either by hand or in a large container, until the water runs clear and free of any discoloration or impurities. This rinsing process helps to neutralize the pH of the hide and prepare it for the next stage of tanning.
Proper rinsing is crucial for achieving an even and consistent tanning result, as any leftover contaminants could interfere with the tanning agents’ effectiveness or cause the hide to develop undesirable odors or discoloration during the tanning process.
Once the hide has been thoroughly rinsed and cleaned, it is ready for the subsequent stages of tanning, which may include soaking in tanning solutions, applying tanning agents, or stretching and drying the hide to achieve the desired softness and durability. Overall, rinsing the pelt is an essential step in preparing a rabbit hide for tanning, ensuring that it is clean, free of impurities, and ready to undergo the tanning process effectively.
4. Tanning
Tanning is a crucial step in the process of preparing a rabbit hide for use in various crafts and projects. After the hide has been fleshed, salted, and rinsed to remove impurities, it undergoes tanning to transform the raw skin into a durable, flexible material.
Tanning involves treating the hide with tanning agents, such as vegetable tannins or synthetic chemicals, that penetrate the skin fibers and permanently stabilize them. These agents bind to the proteins in the hide, preventing decay and ensuring that the hide remains supple and resistant to water, heat, and microbial growth.
The tanning process can take several days or weeks, depending on the method used and the desired result. Throughout this time, the hide is typically soaked in tanning solutions or treated with tanning agents, followed by rinsing and drying to complete the tanning process. Proper tanning is essential for preserving the quality and integrity of the rabbit hide, ensuring that it maintains its natural appearance and characteristics while becoming suitable for use in a wide range of applications, including clothing, accessories, and decorative items.
5. Rinse Hide Again
Remove the hide from the alcohol mixture and wash it in a bucket of soap water to get rid of the alcohol odor. This also helps to make it softer. Rinse it after the soap water.
6. Dry The Fur
Drying the fur is a critical step in the tanning process of a rabbit hide, ensuring that the hide is properly preserved and ready for further use. After the hide has been tanned and rinsed to remove any excess tanning agents, it is carefully stretched and laid out flat to air dry.
This allows the fur to dry gradually and evenly, preventing the formation of wrinkles or creases that could compromise the quality of the finished hide. Depending on the tanning method used and environmental conditions, drying may take several days to complete.
During this time, it’s essential to monitor the hide regularly, flipping it periodically to ensure thorough drying on both sides. Properly dried fur will be soft, supple, and free of moisture, indicating that the tanning process has been successful and the hide is ready for use in various crafts and projects.
7. Rub With Oil
Rubbing the hide with oil is a crucial step in the tanning process of a rabbit hide, as it helps to soften the leather and restore moisture lost during the tanning process. After the hide has been dried completely, it is gently massaged with a suitable oil or conditioner, such as neatsfoot oil or mink oil.
The oil is worked into the hide’s fibers using circular motions, ensuring that it penetrates deeply and evenly throughout the entire surface. This helps to lubricate the fibers, making the leather more pliable and less prone to stiffness or cracking over time.
Additionally, the oil nourishes the hide, replenishing essential oils that may have been depleted during the tanning process. Rubbing the hide with oil also enhances its luster and richness, giving it a more polished and professional appearance. Once the oil has been applied, the hide is left to absorb it fully before being buffed with a soft cloth to remove any excess, leaving behind a smooth and supple finish ready for use in various crafting projects or garments.
8. Wash Off The Oil
Washing off the oil is a critical step in the final stages of tanning a rabbit hide, as it helps to remove any excess oil and residue that may remain on the surface of the leather. After the hide has been rubbed with oil and allowed to absorb it fully, it is gently washed using a mild detergent or soap and warm water.
This process helps to lift away any remaining oil, dirt, or impurities, leaving the hide clean and refreshed. Care must be taken to avoid harsh scrubbing or excessive agitation, as this could damage the delicate fibers of the leather. Once washed, the hide is thoroughly rinsed with clean water to ensure that all traces of soap and oil are completely removed.
Finally, the hide is allowed to air dry naturally, or it can be gently blotted with a clean towel to remove excess moisture before being hung to dry completely. This step ensures that the tanned hide is clean, soft, and ready for use in various crafting projects or as a luxurious material for garments and accessories.
The Bottom Line
How to tan a rabbit hide is not difficult and a lengthy process as tanning a deer hide. There are many different ways to tan a rabbit hide and they all work. In this article, we have discussed how to tan a rabbit hide.
If you want to improve your rabbit hunting skills, you can read the best rabbit hunting tips. We hope this will give you the information you need to tan the rabbit hide after you take home rabbits from your hunting trips. You can also read how tan a deer hide, and how to preserve game meat.