Disclosure: We may earn commissions if you purchase products after clicking on a link from our site.
If you’re looking to capture the perfect trail camera shot, there are a few things you need to keep in mind. In this blog post, we will discuss some of the best trail camera tips for getting great photos and videos! We’ll also cover how to set up your trail cameras for optimal results. So whether you’re a beginner or an experienced trail camera user, be sure to read on for the latest tips and tricks!
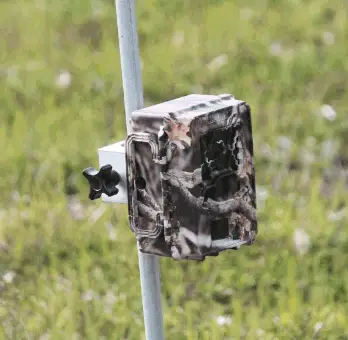
Table of Contents
- 1
- 2
- 3
- 4 Best Trail Camera Tips
- 4.1 1. Location
- 4.2 2. Height
- 4.3 3. Camera Direction
- 4.4 4. Trigger Speed
- 4.5 5. Batteries
- 4.6 6. Memory Card
- 4.7 7. Scent Control
- 4.8 8. Set Up More Than One
- 4.9 9. Level Camera
- 4.10 10. Check For Obstructions
- 4.11 11. Take Test Shots
- 4.12 12. Bait Pile
- 4.13 13. Get Familiar With Camera
- 4.14 14. Use T-Posts or Mounts
- 4.15 15. Theft Prevention
- 4.16 16. GPS Coordinates
- 4.17 17. Google Earth
- 4.18 18. Photo Organization System
- 4.19 19. Be Patient
- 4.20 20. Trail Camera Density
- 4.21 21. Camera Storage
- 4.22 22. Clean Camera
- 4.23 23. Check Batteries
- 4.24 24. Format Memory Cards
- 4.25 25. Camera Movement
- 5 Trail Camera Accessories
- 6 The Bottom Line
Best Trail Camera Tips
1. Location
Choose the right location to set up your trail camera. The right location could be the difference between getting valuable information on the routes and behaviors of the buck you want to get and not getting any good information. Set up the camera so that the target area is 5-10 yards away from the camera.
2. Height
Set the trail camera at the right height. This depends on the animal you want to monitor. If it is a deer, then you want to place the trail camera at chest height. If it is to monitor other animals, then set it a little lower than the chest height.
3. Camera Direction
It is important that you aim the camera in the right direction to gather the information you need. Take along a compass and use it to set your trail camera north or south.
4. Trigger Speed
Set the right trigger speed on the trail camera. With the right trigger speed set, the trail camera will begin taking shots as soon as the deer or other animals step into the frame.
5. Batteries
Trail cameras use a lot of battery power. Make sure to purchase quality batteries that have a long duration.
6. Memory Card
You don’t want to run out of storage while it was taking pictures. Make sure the memory card has a lot of storage.
7. Scent Control
Don’t forget to prevent your human scent from getting on the trail camera as much as possible. Use gloves when setting up the trail camera and use scent-free soap when washing your hands. Also, be mindful of the clothes you wear. Keep them sealed in a scent-free bag until the day of setting up the camera. Be mindful of cigarette and food odor.
8. Set Up More Than One
To get more data, you may consider setting up more than one trail camera. You can’t rely on one trail camera for all the data you need. You will collect more data if you set up many trail cameras monitoring different directions that the animals may frequent.
9. Level Camera
Make sure the trail camera is level. You will benefit from clear and unobstructed images if the camera is level. Blurry or distorted pictures are the result of the trail cameras not being level.
10. Check For Obstructions
Check for any obstructions you may have overlooked that could block the camera’s view. Obstructions like tree branches, leaves, and rocks may be in the line of sight of the camera. Check and double-check for obstructions and remove them if you find some.
11. Take Test Shots
After setting up the trail camera, take some test shots before you leave the area. The test shots will let you know if it is working properly. The test shots will give you a good idea of the pictures the camera takes, how it works, and if it is set up in the right location and pointing in the right direction. Remove any obstructions that are blocking the camera’s view or relocate the trail camera.
12. Bait Pile
The best pictures will be taken when the deer is standing still at a spot. To get this great shot, set up a bait pile in front of the camera.
13. Get Familiar With Camera
Before you set up the trail camera, you should get familiar with the camera. Learn about its features and settings.
14. Use T-Posts or Mounts
If you can’t find a good tree to mount the trail camera, use a tripod or another camera mount to set up the camera. You can also use a T-post or a stake-type camera mount to hold the camera if there are no trees to mount the camera.
15. Theft Prevention
There is a high possibility that if you don’t protect your trail camera from theft, you will not find it when you return on one of your trips. You can use a lock box or a heavy-duty camera box to protect the camera from theft or a bear destroying it.
16. GPS Coordinates
If you are using a good number of trail cameras and have them well hidden with leaves, shrubs, and trees, there is a good chance that they may be covered by the time you return to the site. Mark the exact coordinates of each camera with a handheld GPS unit or a smartphone. Then load the coordinates into Google Earth and update them regularly.
17. Google Earth
With the help of Google Earth, you can locate areas that have significant deer activity that you may be missing. Use Google Earth as a scouting tool to monitor creeks, hills, plots, and other areas for buck territory.
18. Photo Organization System
Develop a photo organization system if you take a lot of photos regularly. You have to develop a system to keep them organized based on the time and days they were taken.
19. Be Patient
Don’t visit your trail cameras every week. This will alert deer to your presence and they will avoid the area. Instead, discipline yourself to visit the area every 3 to 4 weeks.
20. Trail Camera Density
How many cameras you set up depends on a number of factors like the property’s acreage, habitat diversity, your preference, etc. However, the general rule of thumb states that there should be one camera for every 100 acres.
21. Camera Storage
Safely storing your trail camera when not in use is essential to prolong its lifespan and ensure it’s ready for action when you need it. Start by removing the batteries to prevent corrosion and leakage, which can damage the camera’s internal components.
Next, store the camera in a cool, dry place away from direct sunlight and extreme temperatures. Consider using a durable and weatherproof storage container to protect the camera from dust, moisture, and potential damage during transportation or storage.
Additionally, store the camera in a location where it’s unlikely to be disturbed by animals or human activity, reducing the risk of theft or accidental damage. By taking these precautions, you can maintain the integrity of your trail camera and maximize its performance for seasons to come.
22. Clean Camera
Regularly cleaning your trail camera is crucial for maintaining its performance and ensuring clear, high-quality images and videos. Start by removing any dirt, dust, or debris from the camera’s exterior using a soft brush or cloth.
Pay special attention to the lens and sensors, as any buildup in these areas can affect image clarity and motion detection. Use a gentle lens cleaner or lens wipes to clean the lens thoroughly, being careful not to scratch the surface.
Additionally, check the camera’s seals and gaskets for any signs of wear or damage, as these components help protect the camera from moisture and dust. Finally, consider using a protective case or cover to shield the camera from the elements when not in use. By incorporating regular cleaning into your trail camera maintenance routine, you can extend its lifespan and ensure reliable performance in the field.
23. Check Batteries
Regularly checking the batteries in your trail camera is essential for ensuring uninterrupted operation and capturing valuable wildlife footage. Start by inspecting the battery compartment for any signs of corrosion or damage, which can affect battery performance.
Replace any corroded batteries and clean the contacts with a dry cloth to ensure a secure connection. It’s also a good idea to keep spare batteries on hand, especially if you’re using your trail camera in remote locations where access to power sources may be limited.
Additionally, consider using high-quality lithium batteries, which offer longer life and better performance, particularly in cold weather conditions. Finally, make it a habit to check the battery level indicator on your camera regularly and replace the batteries as needed to prevent unexpected power failures. By staying proactive about battery maintenance, you can maximize the uptime of your trail camera and capture more wildlife activity in the field.
24. Format Memory Cards
Formatting the memory card in your trail camera is a crucial tip to ensure optimal performance and prevent potential issues with data storage. Regularly formatting the memory card helps maintain its health by removing any fragmented or corrupted files, freeing up space, and reducing the risk of errors during recording.
Before formatting, it’s essential to transfer any important footage or images from the memory card to a computer or external storage device to avoid data loss. Once backed up, insert the memory card into the trail camera and access the settings menu to locate the option for formatting. Follow the on-screen prompts to initiate the formatting process, which typically erases all data on the card.
After formatting is complete, your memory card will be ready to use with the trail camera, ensuring reliable recording of wildlife activity in the field. Remember to format the memory card regularly, especially after downloading footage, to maintain optimal performance and avoid potential issues during future recording sessions.
25. Camera Movement
As seasons change and deer behavior shifts accordingly, it’s essential to adapt the placement of your trail camera to effectively capture wildlife activity. Moving the trail camera to new locations based on seasonal variations and changing deer patterns can provide valuable insights into their movements, feeding habits, and rutting behavior.
During the spring and summer months, deer may frequent different areas for feeding and bedding compared to fall and winter when they focus more on finding food sources and preparing for the breeding season. By relocating the trail camera strategically along trails, near water sources, or around known feeding areas, you can track deer movements throughout the year and gather valuable data for hunting or wildlife observation purposes.
Additionally, adjusting the camera’s positioning to account for changes in sunlight and foliage density ensures optimal visibility and image quality, maximizing the effectiveness of your trail camera surveillance efforts across seasons.
Trail Camera Accessories
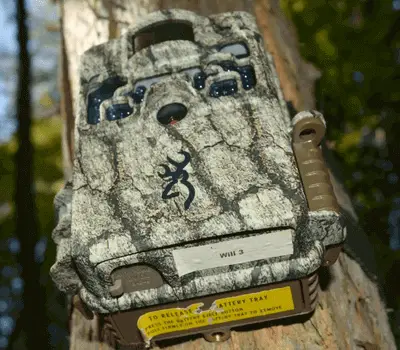
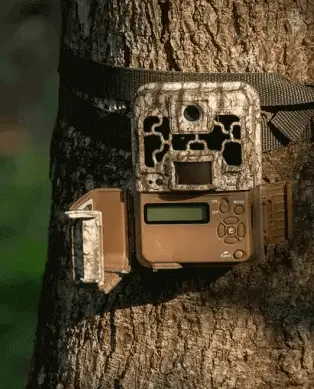
1. Trail Camera Strap
The trail camera strap is used to strap the camera to the tree. The trail camera strap is an essential accessory that ensures the secure attachment of your trail camera to trees, posts, or other sturdy objects in the field.
Typically made of durable materials like nylon or polyester webbing, these straps are designed to withstand outdoor conditions and provide reliable support for your camera. Most trail camera straps feature adjustable lengths, allowing you to customize the fit according to the size and circumference of the mounting location.
Additionally, many straps incorporate sturdy buckles or cam locks for easy installation and removal, facilitating quick setup and repositioning of your trail camera as needed. With its robust construction and versatile design, the trail camera strap is an indispensable tool for effectively deploying and maintaining your trail camera in various outdoor environments, ensuring optimal performance and capturing valuable wildlife footage.
2. Trail Camera Security Box
The trail camera security box prevents the trail camera from being stolen or destroyed by bears. The trail camera security box is a valuable accessory designed to enhance the protection and security of your trail camera in the field.
Constructed from durable materials such as steel or heavy-duty aluminum, these security boxes provide a sturdy enclosure that shields your camera from damage caused by wildlife, harsh weather conditions, and potential theft or tampering. Equipped with multiple mounting points and secure locking mechanisms, these boxes offer a robust defense against unauthorized access, deterring would-be thieves and vandals.
Additionally, many security boxes feature camouflage or weather-resistant finishes to help them blend seamlessly into the surrounding environment while providing maximum concealment for your trail camera. With its reliable construction and added security features, the trail camera security box is an essential accessory for safeguarding your valuable investment and ensuring continuous operation in any outdoor setting.
3. Trail Camera Holder
The trail camera holder holds the trail camera in place. The trail camera holder is a versatile accessory designed to provide optimal positioning and stability for your trail camera in various outdoor environments.
Typically made from durable materials such as metal or heavy-duty plastic, these holders feature adjustable arms or clamps that securely grip onto tree branches, poles, or other objects, allowing you to easily mount your camera at the desired angle and height. With its flexible and adjustable design, the trail camera holder enables you to achieve the perfect vantage point for capturing wildlife activity, ensuring clear and accurate footage or images.
Whether you’re monitoring a game trail, a food plot, or a remote hunting location, the trail camera holder offers a convenient and reliable solution for keeping your camera securely in place, even in rugged terrain or inclement weather conditions. With its lightweight and portable design, this accessory is essential for maximizing the effectiveness and versatility of your trail camera setup, providing you with valuable insights into the behavior and movements of wildlife in your area.
4. Trail Camera Solar Panel
The trail camera solar panel provides power for the trailing panel. The trail camera solar panel is an innovative accessory designed to enhance the functionality and longevity of your trail camera setup.
Featuring a compact and weather-resistant design, these solar panels are equipped with photovoltaic cells that harness the power of the sun to recharge the batteries of your trail camera continuously.
By harnessing renewable solar energy, this accessory ensures that your trail camera remains powered and operational for extended periods, even in remote or off-grid locations where access to conventional power sources may be limited. With its easy-to-install design, the trail camera solar panel seamlessly integrates into your existing setup, providing a sustainable and environmentally friendly power solution.
Whether you’re monitoring wildlife activity, conducting research, or enhancing security measures, the trail camera solar panel offers a reliable and cost-effective way to extend the battery life of your trail camera, ensuring uninterrupted performance and peace of mind in any outdoor setting.
The Bottom Line
If you use trail cameras for hunting, then you want to get the best photos of your target to get the data you need. We have discussed the best trail camera tips to help you collect the data you need to take home more bucks during the hunting season. You can read about the best trail cameras on the market today from this link.
You can also read the best predator calls, the best trail cameras, the best hunting gps, the best climbing treestands, and the best hunting ground blinds.